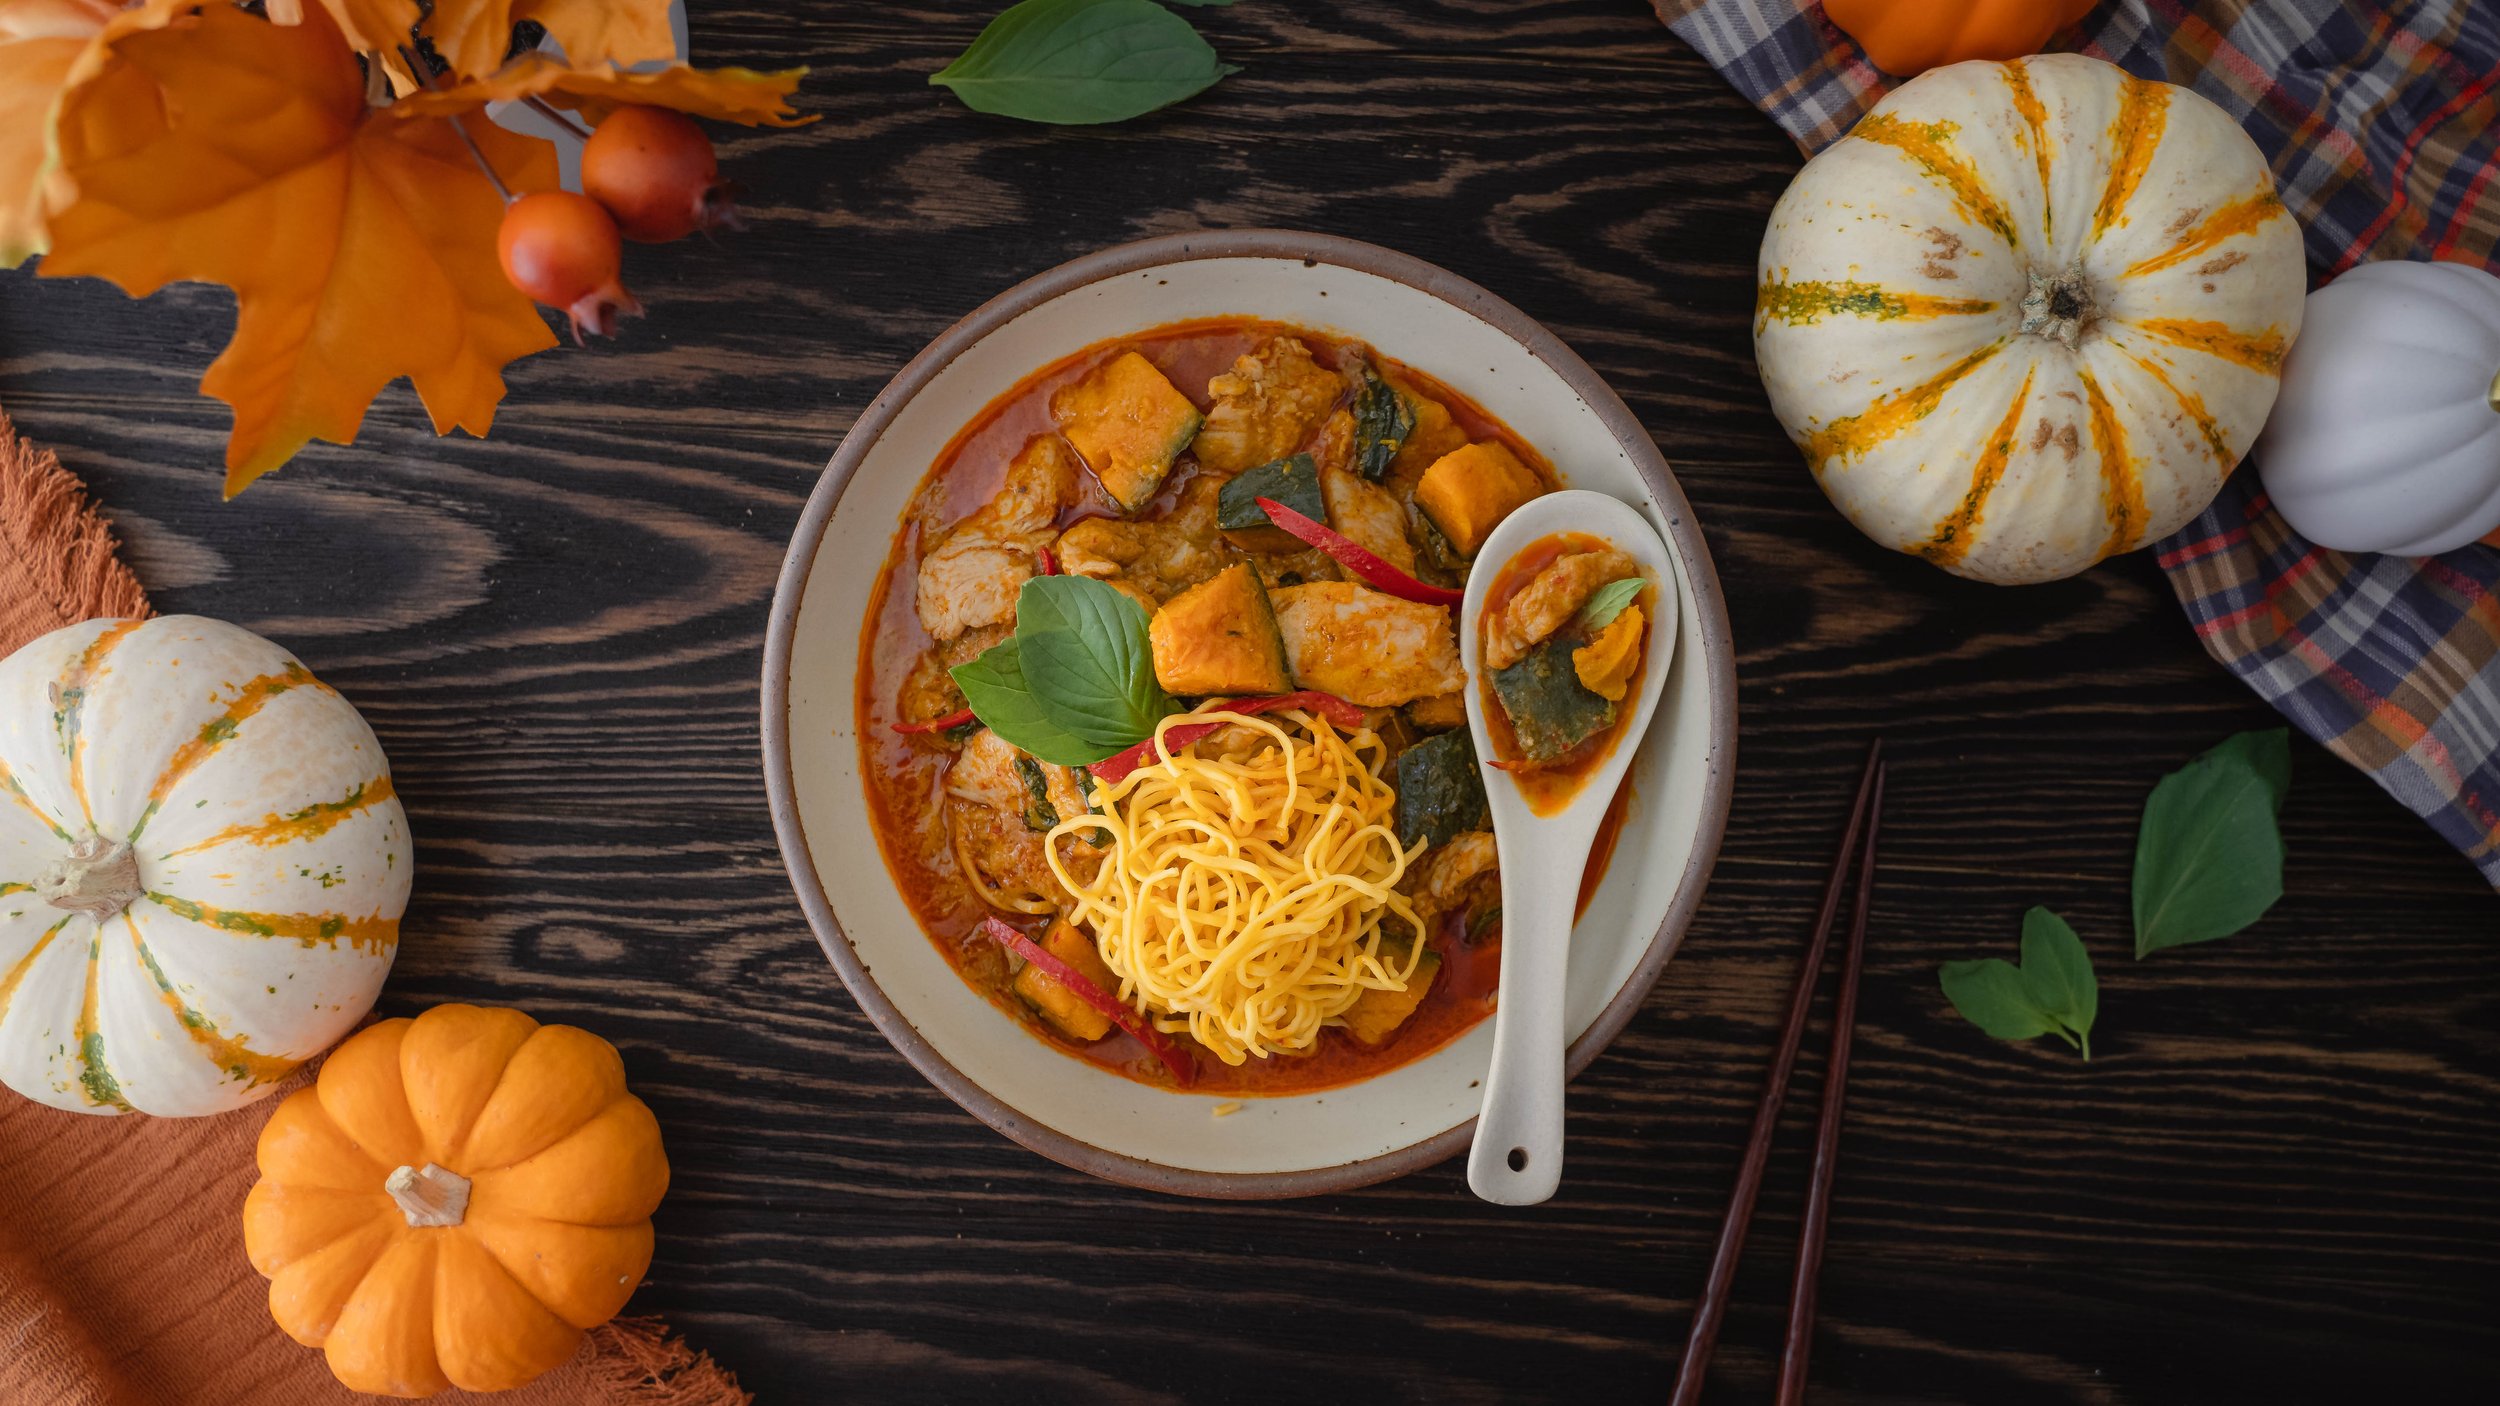
Thai Red Curry
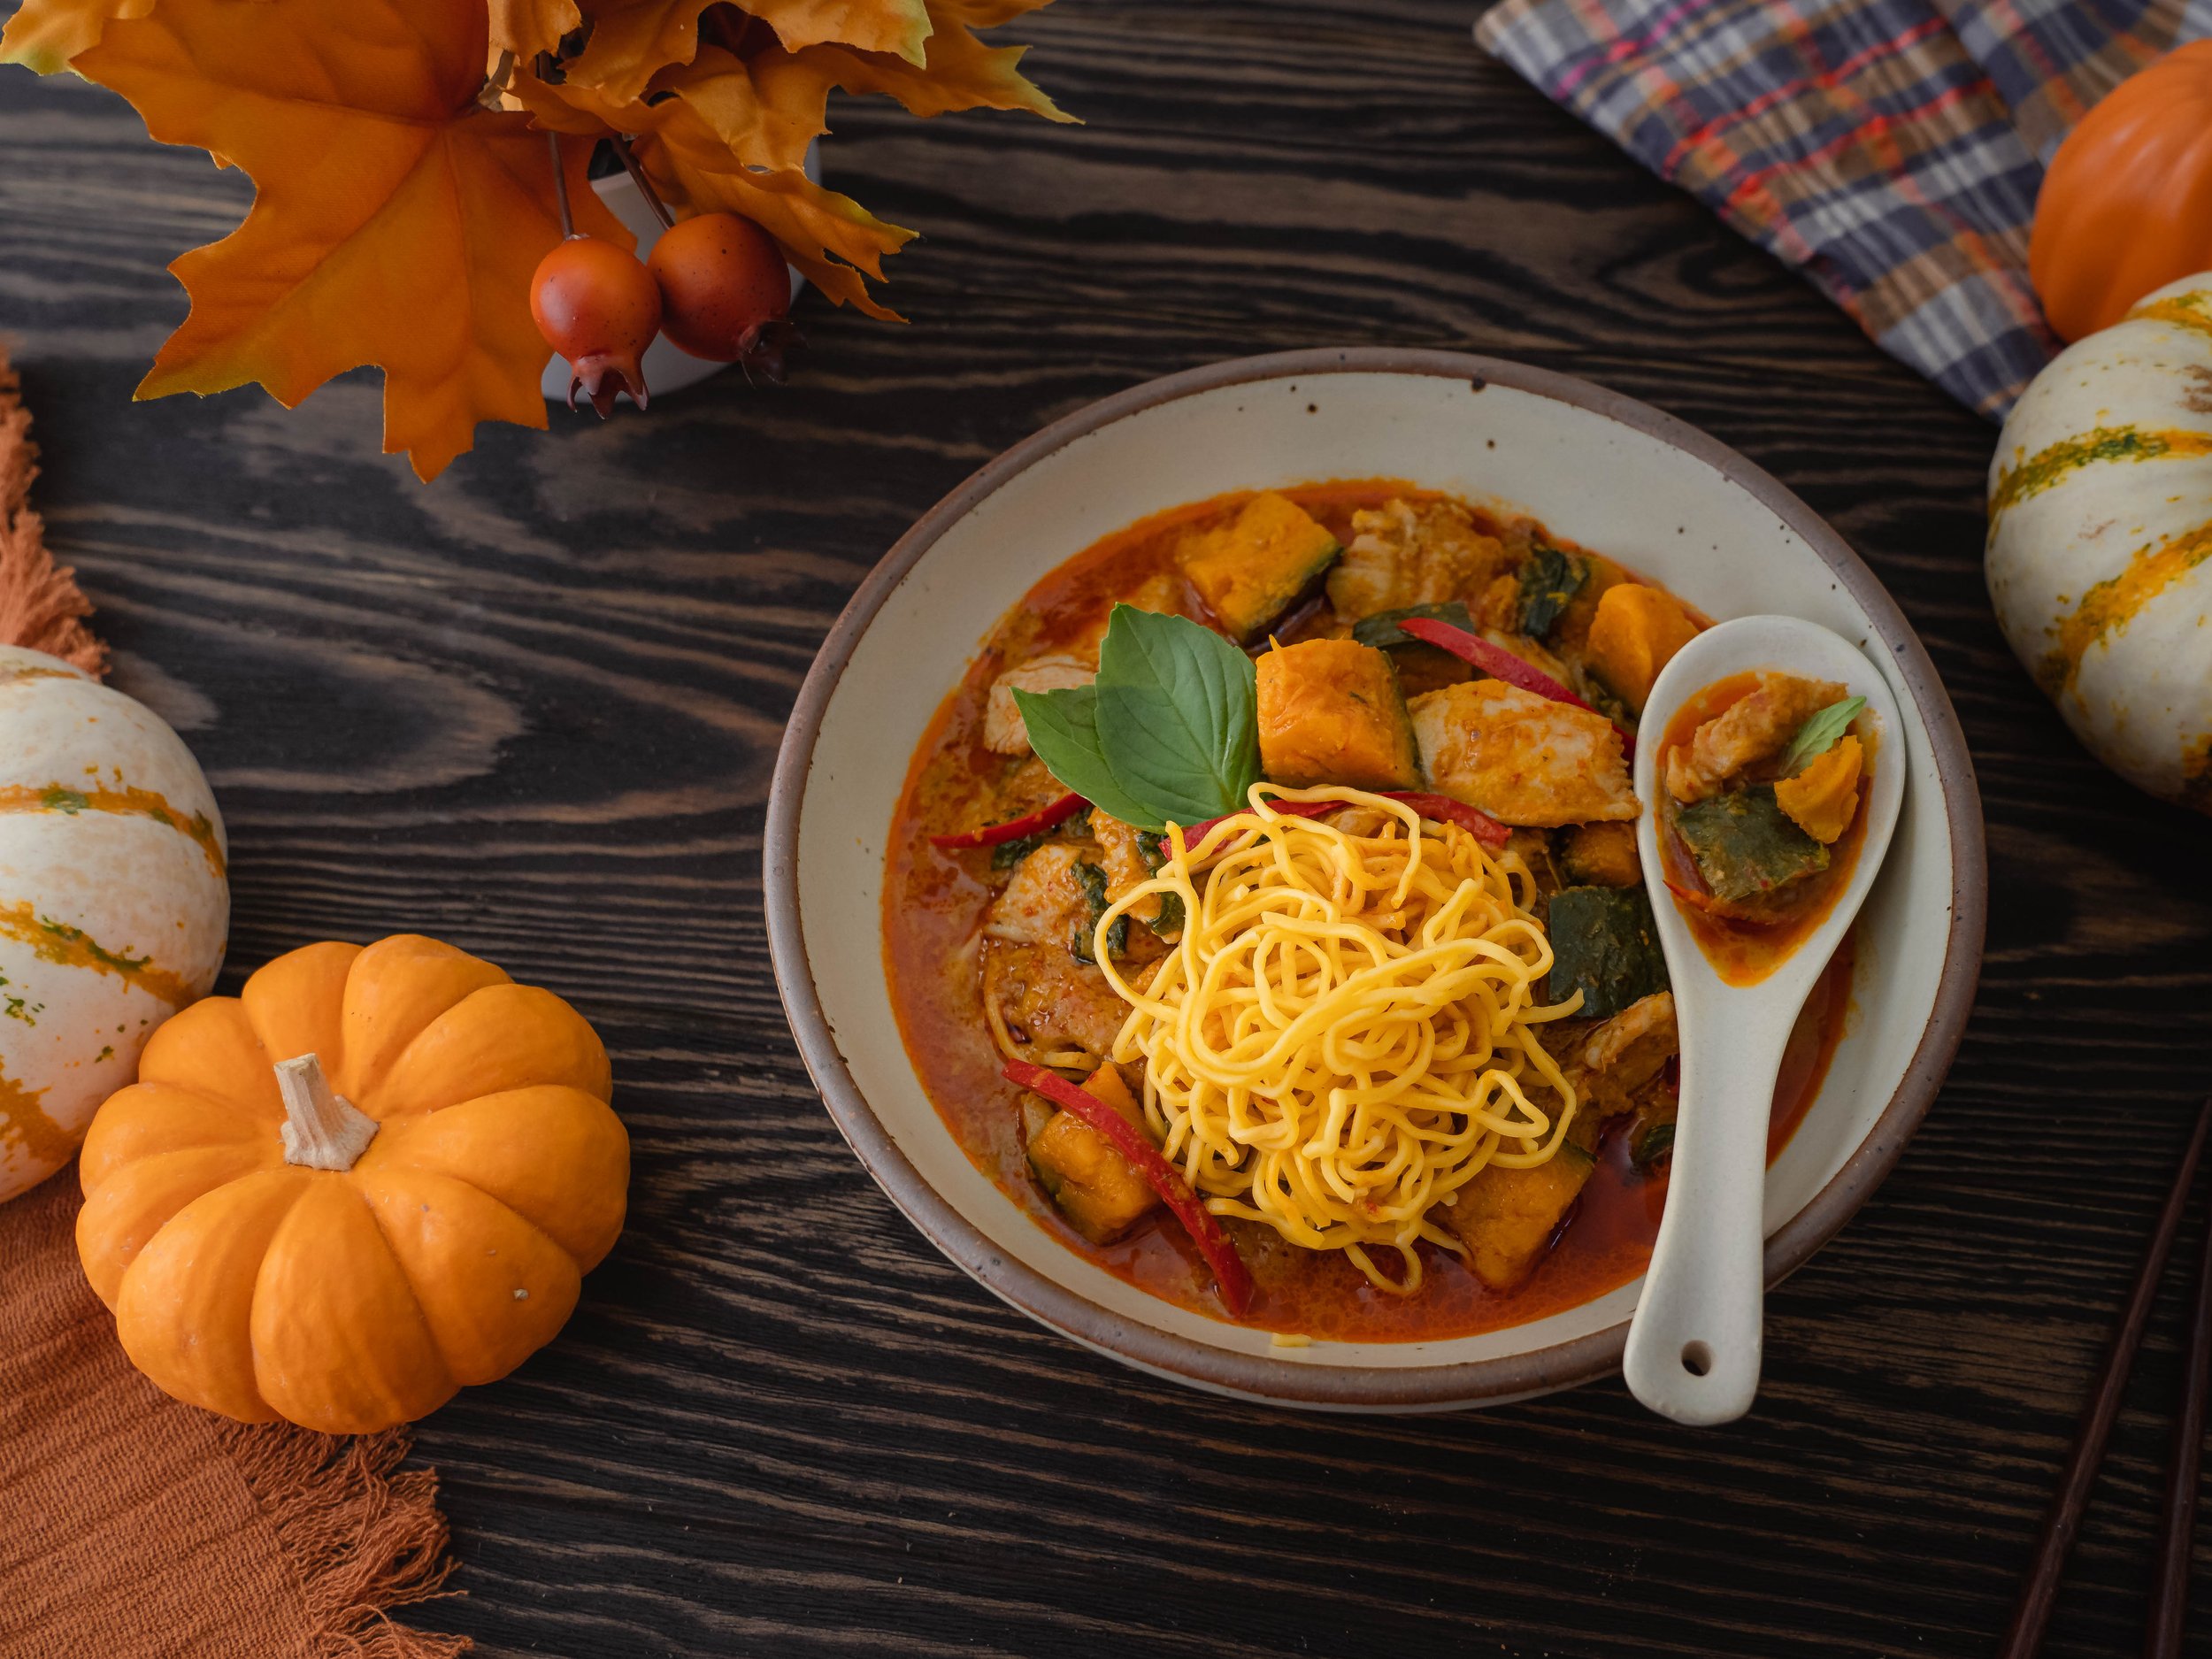
And just like that pumpkin season has come to an end! But before we move onto much merrymaking and festive recipes, I would like to squeeze in one last pumpkin/squash recipe that is great for cold weather. Enter my absolute favorite Thai red curry made with chicken and kabocha squash.
Video Tutorial
Last time I made this curry, Arafat loved it so much, he asked when I was showcasing it on the food blog. I had no plans because this was just one of my go-to dishes in my arsenal. It's a great weeknight recipe when I am too tired and cooking dinner should take only 30 minutes. It’s also a one pot dish using whatever seasonal ingredients are available. Although, the autumn/winter version is my favorite because of this one particular vegetable — Kabocha Squash!
Note: Kabocha Squash
What is Kabocha Squash
Kabocha is a type of winter squash, also known as Japanese pumpkin in North America. In most culture, kabocha is commonly used in side dishes and soups and go on to substitute potato or other squash varieties.
What does it taste like?
Kabocha has an exceptional sweet flavor, even sweeter than butternut squash. It is similar in texture and flavor to a pumpkin and sweet potato combined. Some varieties of kabocha can taste like Russet potatoes or chestnuts. Its flesh has a sweet, earthy flavor with hints of chestnut, and is chock full of beta-carotene, fiber, and vitamins A and C.
Do I need to peel it?
The rind is edible although some cooks may peel it to speed up the cooking process or to suit their personal taste preferences. I personally don’t recommend it because the skin is very much edible and it tastes pretty good! Many Japanese and Thai recipes such as kabocha tempura and thai red curry, require to keep the skin on. But if it does have slight blemishes, you may slice off that part of the skin. If you choose to peel the skin, keep in mind your cooking time will be a lot faster.
Other substitutes?
Pumpkins - other pumpkins and squash varieties like butternut squash or delicata squash works great, and you don’t have to peel their skin either
Potatoes - russet potatoes and sweet potatoes are great substitutes, just keep in mind they do take a longer time to cook. My trick is to boil them in the microwave for 3-4 minutes, so they are par-cooked, and then add the potatoes to the curry.
Chinese long beans - also known as yard-long beans and snake beans, they are very common in Thai, Chinese and Bangladeshi cuisine. Long beans are a pretty common ingredient in red curry, especially in the summer when they are in season. French green beans also work as a decent substitute.

Note: Curry Paste
Not all Thai curry pastes are made the same. Some are more mellow and some are saltier, some are bland and some have a lot of spice and umami. My go to curry paste brand is Maesri, and what I use for this recipe. Other curry paste brands I like are Mae Anong and Mae Ploy.
Mae Anong and Maesri has more smooth and round flavors with Mae Anong being slightly more robust and rich compared to Maesri. Mae Ploy does have a nice heat and depth of red curry flavor but it is a little bit more salty so be mindful about adding extra fish sauce. And finally a word of caution, stay away from the “Thai Kitchen” brand of curry pastes.
What if I can’t find any of the brands you recommended?
Well then my friend, looks like you have to make your own curry paste from scratch. I have not shared my curry paste recipe yet, but I personally recommend Pailins Kitchen and Mark Wiens, because they are Thai and it is authentic. If you are looking for the true flavors, make sure not to substitute any of the ingredients. Yes, you will need to make a trip to your local Thai grocery store and guess what? You will find all the curry paste brands I mentioned there. You might as well stock up on quality curry paste if you love Thai food.
You can read more about my true feelings about buying curry pastes vs making curry pastes in my extremely passionate and informative post on green curry where I also share my green curry recipe.
Note: Coconut Milk + Coconut Cream
Always get the box kinds like Aroy-D and Kara. Although when it comes to canned, I do like the Native Forest Coconut Milk and Native Forest Coconut Cream, which you may also find at your local WholeFoods.
What's the difference between coconut milk and coconut cream?
Coconut cream is JUST the fat, coconut milk has a higher water content. You can refrigerate a can of coconut milk and the fat will settle & harden at the top if you want to extract it. You can try this experiment but you will need at least 2 cans of coconut milk to get sufficient amount of cream for the curry. I like to make my life easier and just buy both the coconut cream and milk.
How do I store leftovers?
Unless fresh, coconut milk and cream spoil quickly, so if you have leftovers, store it in a mason jar in your freezer. Coconut milk will keep in the freezer for up to one month and coconut cream will freeze well up to 2 months.
Notice in the video how both the coconut cream and coconut milk has iced slushies like texture, because they were both frozen previously.

Recipe — Thai Red Curry
With Chicken + Kabocha Squash
Serving Size: 4
Ingredients
Coconut Cream - 1/2 cup
Maesri Red Curry Paste - 4 oz
Boneless Chicken - 1 lbs, thighs or breasts, thinly sliced
Makrut Lime Leaves - 4-5, destemmed and crushed to release aroma
Coconut Milk - 1 cup
Chicken Bone Broth - 1 cup
Kabocha Squash - 1/2 (about 1-2 cups), diced into bite size pieces
Fish Sauce - 1-2 tsp, or to taste
Palm Sugar or Brown Sugar - 1 tsp, or to taste
Thai Basil Leaves - 10-15, about a handful
Red Spur Chilies or Red Anaheim Pepper - 1, deseeded and julienned
*** Please scroll back up and see notes on ingredients and substitutions.
Directions
Add coconut cream to a large Dutch Oven over medium-high heat. Bring it to a boil, stirring often, until the milk solids have dissolved. Continue stirring so it does not catch at the bottom of the pot. Once the coconut cream has completely reduced, it should look split — the fat and the oil separated like in the video. This should take about 5 minutes.
This is an important step to making any good Thai curry. You are cooking off the water in the coconut cream so you are left with milk solids and oil, in which you will be frying the curry paste next. Now, if for some reason even after 5 minutes, the cream hasn’t split, you are allowed to cheat, and add 1 tbsp vegetable oil to help it along the way.
Decrease the heat to medium-low. Add the curry paste and stir well. Cook, stirring frequently until you no longer get the the raw smell of the curry paste and it has turned a couple shades darker, going from orange-red to dark brown-red. You can also tell the curry paste is completely cooked off when you can no longer distinguish the coconut cream from the curry paste. This step should also take about 5-10 minutes.
Note: If you want a great tasting curry, patience is of utmost importance.
Increase the heat to medium. Add the chicken pieces and crushed makrut lime leaves. Combine it well with the curry paste and allow some time for the chicken to parcook, going from the raw pink to a cooked white color. Continue stirring and sautéing to make sure the chicken and curry paste does not catch at the bottom. This should take about 5 minutes.
Add the coconut milk and chicken bone broth. Stir well and bring the mix to a simmer, don’t let it boil. About 5 minutes. If it starts boiling, reduce the heat to medium-low.
If you prefer a thick gravy, add more coconut milk and less chicken bone broth.
If you prefer a thin gravy, add more chicken bone broth and less coconut milk.
Decrease the heat to medium-low. Add the kabocha squash and simmer for another 5-10 minutes or until fully cooked.
How to tell if Kabocha Squash is cooked - Gently pierce it with a knife or a skewer and it should go through without any resistance.
If kabocha is overcooked, it will turn into mush. And instead of curry with a thin gravy, it will turn into a porridge like consistency, so pay attention to your time and texture of the squash.
If you choose to peel the skin (I don’t recommend), cut your cooking time in half. It will cook even faster.
Reduce the heat to low. Now you can taste and adjust the seasoning by adding more fish sauce and brown sugar.
Stir in the Thai basil leaves and thinly sliced red pepper. Cover the lid and allow it to sit for 5-10 minutes before serving.
Serve with jasmine rice, rice noodles or egg noodles.
Final Note:
If you are not serving right away, remove the basil leaves after 10 minutes. If you see oil rise to the surface after 10 minutes, this is a very very good sign — it’s means you cooked the curry correctly.
I’ve personally noticed Thai curries taste even better the next day. Arafat even texted me from work during lunch “this tastes so good, can you make it again?”. It’s great for batch cooking and meal planning. And if you have guests coming over and you are in the mood for Thai, cook it one day ahead, one less dish for you to worry about when hosting.
If you want a more thorough guidance on Thai curry and how to make curry paste from scratch, check out our Thai Green Curry post.
If you have any questions, leave a comment below this post and we will be happy to answer it for you!
If you do recreate our recipes, be sure to
TAG & FOLLOW @TheSpiceOdyssey
Stay up to date with us on Instagram, Pinterest, Youtube and Facebook.